How do I map departments to pools?
A department says which pool an account belongs to. Category says what kind of cost it is. Mapping departments first makes the account mapping that follows more accurate.
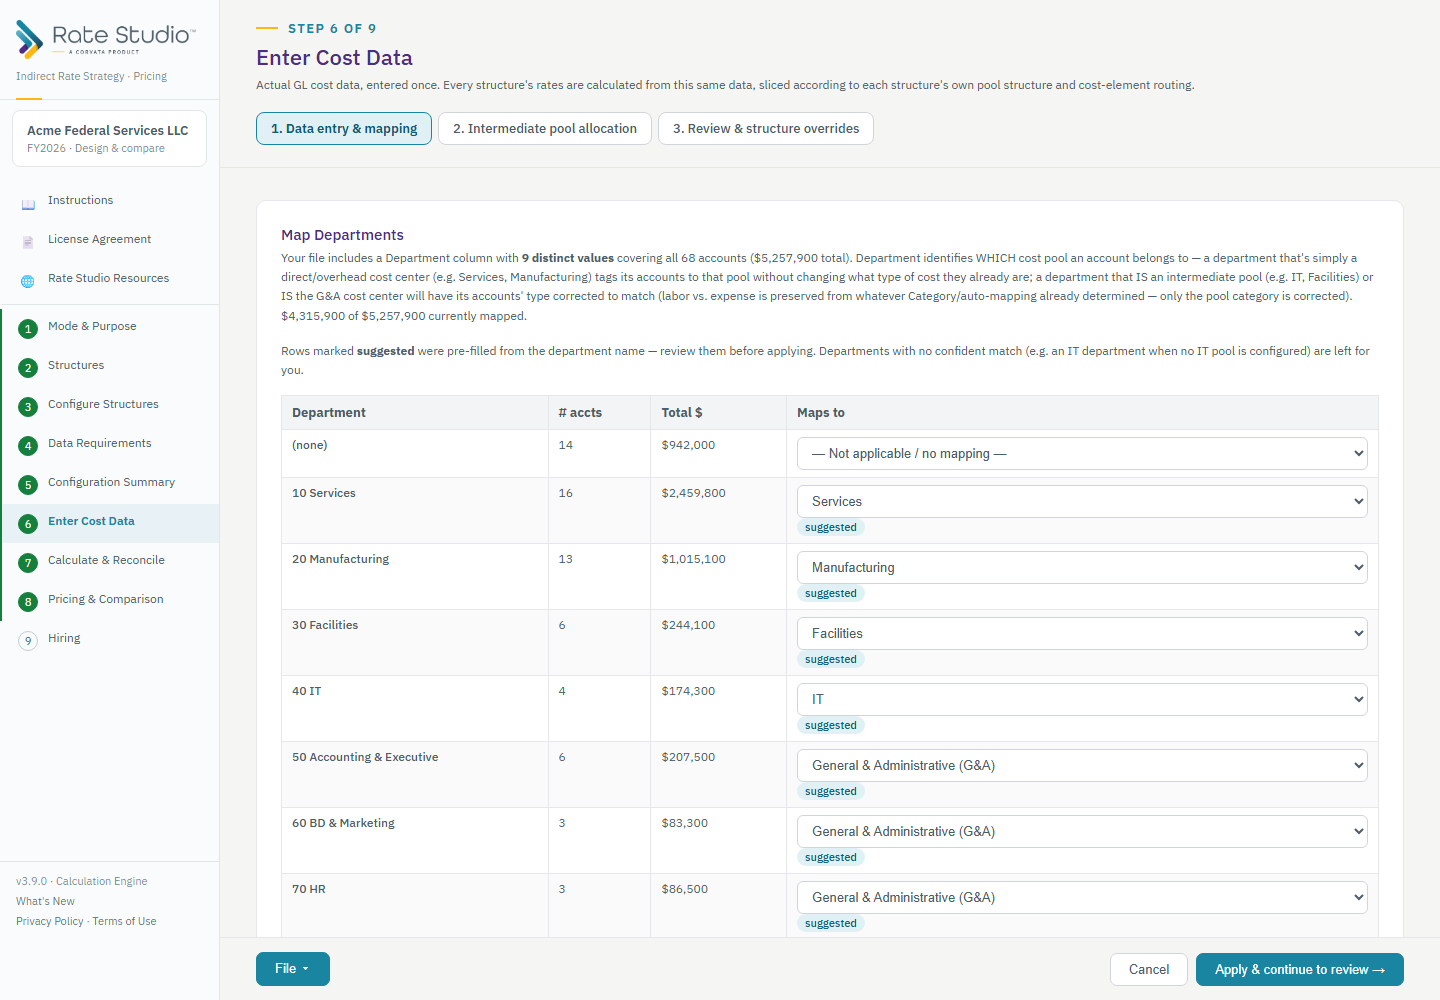
Steps
- Upload your trial balance and confirm the columns (see How do I upload a trial balance?). If the file has a Department column, the department mapping step appears.
- Rows marked suggested were pre-filled from the department name. For example, "10 Services" goes to your Services pool, "30 Facilities" to your Facilities intermediate pool, Accounting, BD & Marketing and HR to G&A, and an MSOH department to MSOH.
- Review each suggested row and change any that are wrong.
- Set any department Rate Studio could not match. For example, an IT department when you have not configured an IT pool is left blank for you to decide.
- Apply the mapping. Every account in that department follows automatically, and it feeds the category-mapping suggestions in the next step (see How do I map categories and review account mappings?).
Map each distinct department once to an overhead pool, an intermediate pool or G&A.
If this doesn't work: if the mapping looks wrong after review, see How do I map categories and review account mappings? or My calculated rate doesn't match what I expected.
Watch: Upload and map a trial balance, map the departments from 0:57
Full guide section: Enter Cost Data
Related: How do I upload a trial balance? | How do I map categories and review account mappings? | How do I update mappings when I upload next year's file?